TourTrax.NET Data Retention Plan
TourTrax.NET has historical data stored on the platform for access in the event that the user was not receiving email reports of the activity. This document will cover the process of exporting that data for local storage so that a client does not lose access to it if an account is closed. If the users were receiving scheduled email reports then they may already have a backup of the data stored in their email. Even if they do, some may want to export the data regardless so they can have it stored in more than one location.
Primary Data Reports
When exporting data from TourTrax the primary reports that will be used are listed below.
- Activity Report (report containing all tags scans that occured)
- Dynamic Tour Full Report (The most comprehensive Dynamic Tour report. If Dynamic Tours were in use)
- Static Tour Full Report (The most comprehensive Static Tour report. If Static Tours were in use)
With these three reports a client can export all relevant data for external storage to maintain access to their data in the event that their account is closed.
Exporting Activity Report (All)
The steps below will explain the process of exporting the Activity Report data from TourTrax.
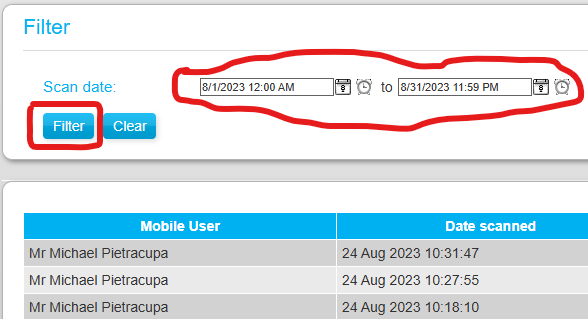
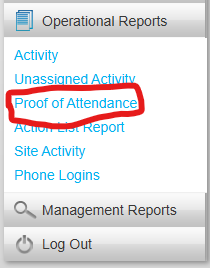
1. After logging into TourTrax, go to Operational Reports / Activity
2. Enter the date range you want to export and select “filter”. This will populate the report with the data you will be exporting. It is mandatory that you export only one month of activity at a time to prevent the query from being too large.
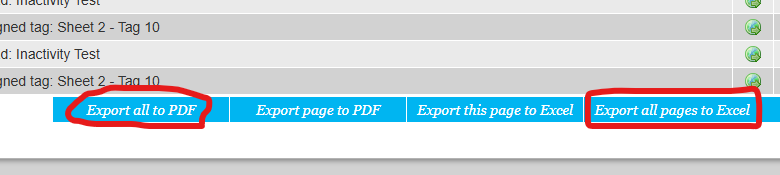
3. Once the query is finished scroll to the bottom of the page and find the export options. This can be exported in either Excel or PDF depending on your requirements. Ensure you select “All Pages” to include the entire query and not just the current page.
4. Repeat these steps for each month you wish to export data for.
Exporting Activity Report (By Site)
The steps below will explain the process of exporting the Activity Report data from TourTrax if site separation is required for the data.
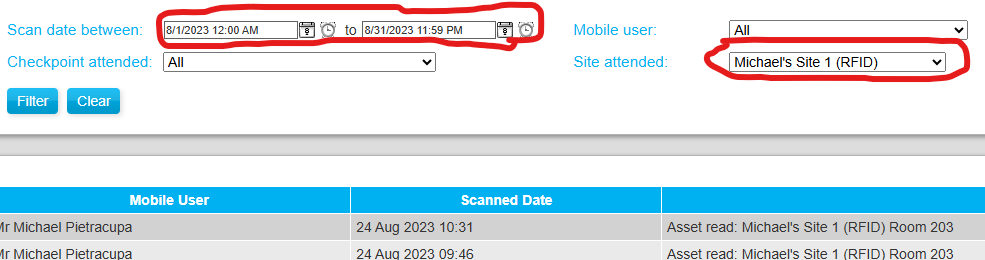
1. After logging into TourTrax, go to Operational Reports / Proof of Attendance
2. Enter the date range and the site you want to export and select “filter”. This will populate the report with the data you will be exporting. It is mandatory that you export only one month of activity at a time to prevent the query from being too large.
3. Once the query is finished scroll to the bottom of the page and find the export options. This can be exported in either Excel or PDF depending on your requirements. Ensure you select “All Pages” to include the entire query and not just the current page.
4. Repeat these steps for each month and site you wish to export data for.
Export Dynamic Tour Full Report
The steps below will explain the process of exporting the Dynamic Tour Full Report data from TourTrax. Only if Dynamic patrols were in use.
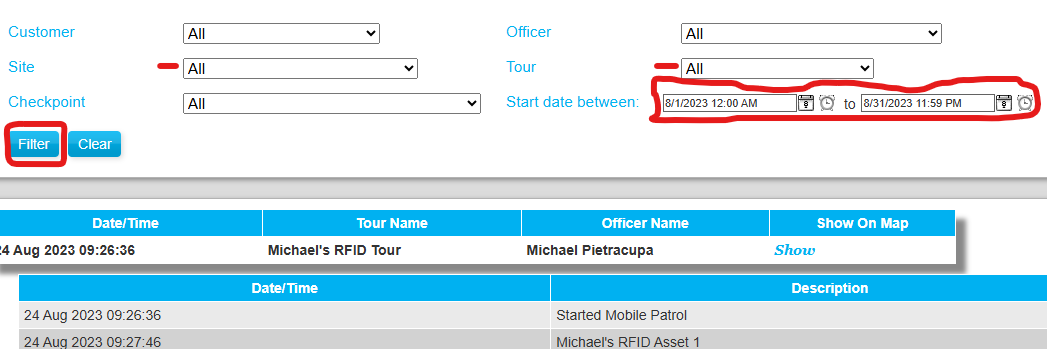
1. After logging into TourTrax, go to Management Reports / Dynamic Tour Full Report
2. Enter the date range you want to export and select “filter”. This will populate the report with the data you will be exporting. It is mandatory that you export only one month of activity at a time to prevent the query from being too large. In some cases you may also want to additionally filter by Site and Tour
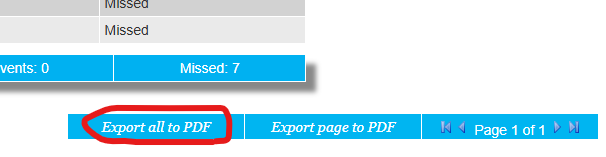
3. Once the query is finished scroll to the bottom of the page and find the export options for PDF export. Ensure you select “All” to include the entire query and not just the current page.
4. Repeat these steps for each month, site and tour you wish to export data for.
Export Static Tour Full Report
The steps below will explain the process of exporting the Static Tour Full Report data from TourTrax. Only if Static patrols were in use.
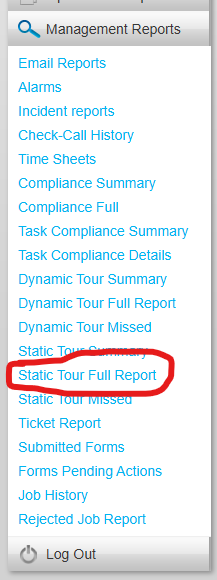
1. After logging into TourTrax, go to Management Reports / Static Tour Full Report
2. Enter the date range you want to export and select “filter”. This will populate the report with the data you will be exporting. It is mandatory that you export only one month of activity at a time to prevent the query from being too large. In some cases you may also want to additionally filter by Site and Tour
3. Once the query is finished scroll to the bottom of the page and find the export options for PDF export. Ensure you select “All” to include the entire query and not just the current page.
4. Repeat these steps for each month, site and tour you wish to export data for.

.png)